Laravel is a popular PHP framework known for its elegant syntax and robust features, making it a favorite among developers for web application development. To streamline your workflow, you might want to install Laravel globally on your machine using Composer. This guide will walk you through the steps to achieve this, ensuring your installation is smooth and efficient.
Prerequisites
Before you begin, ensure you have the following installed on your machine:
- PHP: Laravel requires PHP 7.3 or higher.
- Composer: A dependency manager for PHP.
If you haven’t installed PHP or Composer yet, follow the instructions on their official websites to get them set up.
Step 1: Verify PHP Installation
First, check if PHP is installed on your machine. Open your terminal and run the following command:
php -vYou should see the PHP version information displayed. If not, install PHP according to your operating system’s guidelines.
Step 2: Verify Composer Installation
Next, confirm that Composer is installed by running:
composer -vIf Composer is not installed, download and install it from the Composer website.
Step 3: Install Laravel via Composer
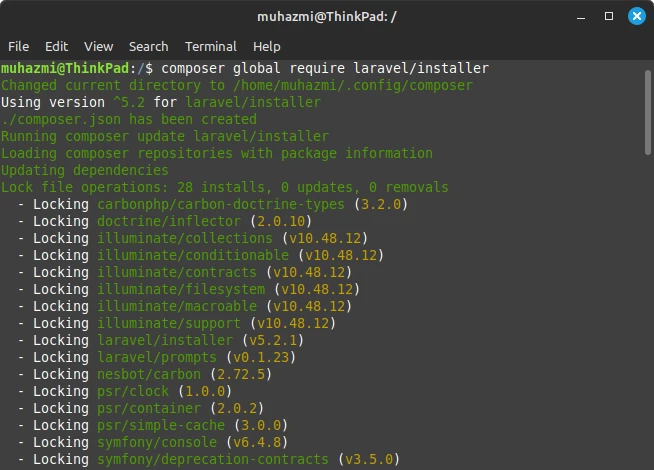
With PHP and Composer installed, you can now proceed to install Laravel globally. Run the following command in your terminal:
composer global require laravel/installerThis command will download the Laravel installer and make it available globally on your machine.

Step 4: Add Composer to Your System Path
To use the Laravel installer from any directory, you need to add Composer’s global bin directory to your system’s PATH. The exact method to do this depends on your operating system.
For Windows:
- Open the Start Search, type in “env,” and select “Edit the system environment variables.”
- In the System Properties window, click on the “Environment Variables” button.
- In the Environment Variables window, find the “Path” variable in the “System variables” section and select it. Click “Edit.”
- Click “New” and add the path to your Composer bin directory. This is usually
C:\Users\<YourUsername>\AppData\Roaming\Composer\vendor\bin.
For macOS and Linux:
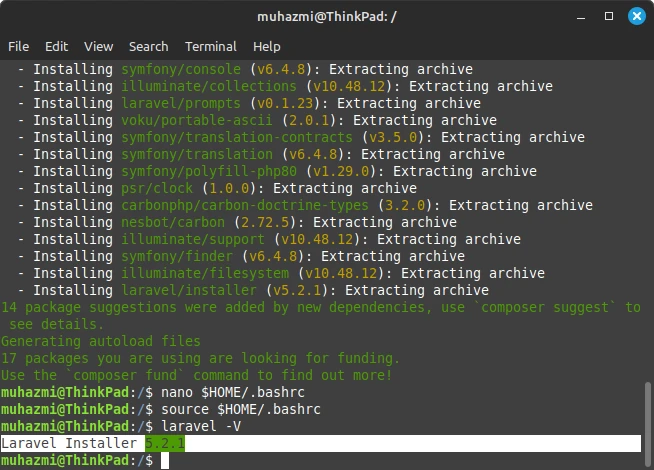
Edit your .bashrc file:
nano $HOME/.bashrcThen, add this following line to your ~/.bashrc, file, depending on the shell you are using:
export PATH="$PATH:$HOME/.config/composer/vendor/bin"NOTE:
nano is a simple text editor, you can run another if you want like gedit, vi or etc.

Use the source command to force Ubuntu to reload your .bashrc file:
source $HOME/.bashrcStep 5: Verify Laravel Installation
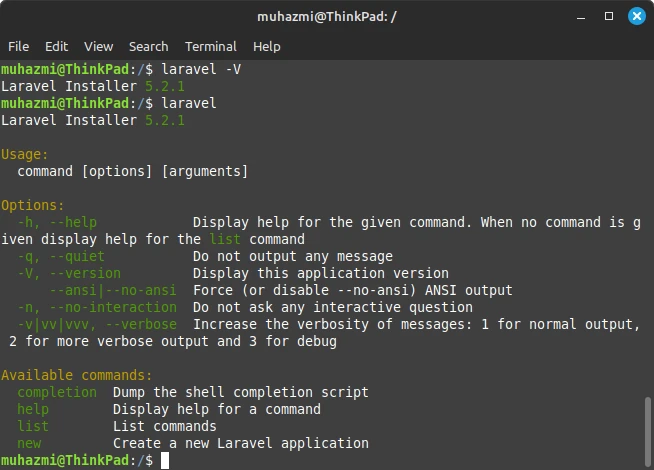
To confirm that Laravel has been installed globally, run the following command:
laravelYou should see a list of Laravel commands, indicating that the installation was successful.

Step 6: Create a New Laravel Project
Now that Laravel is installed globally, you can create a new project from any directory. Use the following command to create a new Laravel project named example-app:
laravel new example-appThis command will create a new Laravel application in a directory named example-app.
Conclusion
Installing Laravel globally on your machine via Composer simplifies your development workflow, allowing you to create new Laravel projects with ease. By following this guide, you’ve set up your environment to leverage the power of Laravel for your web application development needs.
For more information on using Laravel, check out the official Laravel documentation.
What are your thoughts on this topic? Share this to your social media / friends and give your experiences in the comments below!


